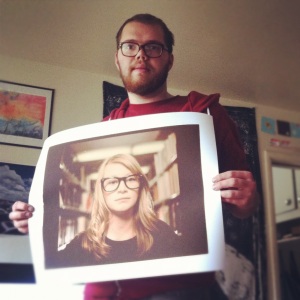
I’ve been shooting Fuji FP-100C instant film on my friend Alicia’s Mamiya RZ67 a lot recently and recently discovered a really cool process. I first read about it in Film is not Dead a book by Jonathan Canlas. In the book he describes how you can take the back of the peel-away instant film, and by a process of bleaching reveal the actual plastic negative. I started doing some research on this and came across this blog post by Joey Early detailing the steps. The only difference in my process is that I used a Mr. Clean Magic Eraser rather than bleach.
I decided to try it out.
I recently asked to shot some graduation photos for my friend Mistea. We wanted to do something fun and different, so we took some prop glasses into the basement of the university library, where we set up some lights among the stacks and got to shooting.
Being a Sunday, the Missoula photo stores were closed, so I couldn’t buy any of the instant film that I so badly wanted to get some shots with. Luckily Alicia had 6 shots left from a pack that was already loaded, and let me take them. After wasting two (one due to a bad sync cord, and the other because I forgot to take the dark slide out) I got 4 nice shots of here on the Mamiya/Fuji instant.
The main problem I had was with the actual color toning of the image after the scan.
This is the test photo from my D300:
This is a quick shot of the positive from the Fuji FP-100C:
This is the negative after stripping the black backing off:
The raw scan, without any toning:
And here is the final, ready for print image:
Here’s a BTS shot by Alicia. That’s my Alien Bee B800 in a beauty dish with the diffusion sock behind me.
Keep an eye out for some more posts, including the final images from this shoot, as well as an album cover I recently shot/designed for a friend of mine.
Thanks for looking
-Steel


Hey Steel,
By any chance did you remember to take off the excess dried chemistry off the emulsion side? Looking at your images of the negative and your flat results from the scan it looks like the extra density and coloring from the dried chem is effecting your results. Also what are you scanning on? I tried using an imacon and the results were terrible, the scanner just did not have the latitude of settings I needed to fully correct the image. Using Epson scan on a v700 game me much better results.
these are my final results from the process. http://www.whatisphotobox.com/?p=964
I wasn’t sure about that part. I ran it under water until it no longer felt slimy. But there was a purple-ish membrane like layer that began rubbing off on the edges of the image. Is that what needs to be cleaned off completely?
The scanner was a Epson Expression 10000 XL.
Thanks for your help!
Yeah you should feel and see the slightly purple layer start to come up. This is the chemistry that sits above the emulsion, if you rub hard enough you will see the emulsion start to come off but that takes some time and effort. The purplish layer should come off fairly easily with soft circular strokes while water is running over it. After this it should be much easier to color correct and the color fidelity should be much truer.
Yeah of course. It took me forever to figure everything out on my own, which is why I made that post, I know how it can be frustrating to expect one result and get another.
Pingback: Instant Film Fun, Part 2 | Steel Brooks Photography